GPS 122 - Tolerance Zones
Tolerance zones are the building blocks of geometrical tolerancing. Learn about the shapes of tolerance zones and how to control their ability to move.
Tolerance zones are the building blocks of geometrical tolerancing within GPS. Understanding what shapes they can take and how they can or cannot move are fundamental skills for geometrical tolerancing.
In this course, you will learn about the different shapes geometrical tolerance zones can take and how you can use constraints to limit their ability to move.
The course builds to some extent on GPS 120 – Introduction to Geometrical Tolerancing and GPS 121 – Degrees of Freedom to explain tolerance zones.
There are three types of tolerance zones that a geometrical tolerance can create:
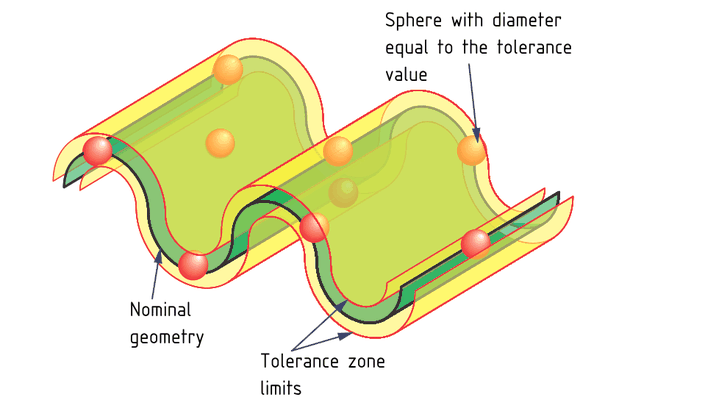
- A 3D tolerance zone, limiting an area in space by one or two surfaces, for example two parallel planes.
- A 2D tolerance zone, limiting an area in a plane by one or two lines, for example two parallel lines in an identified cross section.
- An infinite set of 2D tolerance zones, each limiting an area in a plane by one or two lines, for example two parallel lines in each of an infinite number of parallel cross sections.
The course cover all the possibilities within these three types, for example a tolerance zone limited by two parallel planes or one limited by a cylinder.
The course uses the degrees of freedom concept to identify the redundant degrees of freedom for each tolerance zone shape. The redundant degrees of freedom are those, where the tolerance zone "looks like itself", if it moves along that degree of freedom.
The course also introduces the concept of constraining a tolerance zone, which means locking it so it cannot move in the direction of one or more of its non-redundant degrees of freedom.
Finally, the course demonstrates how very precise requirements can be specified by using a number of tolerance zones with different constraints and different tolerance values.
Your Instructor

Dr. Henrik S. Nielsen is the president of HN Metrology Consulting and HN Proficiency Testing, the first accredited proficiency testing provider catering to dimensional inspection and calibration laboratories in the US.
His areas of expertise include geometrical product specifications, dimensional metrology, uncertainty estimation and quality assurance for calibration laboratories. He teaches seminars on all of these subjects though various organizations.
Dr. Nielsen is the chairman of ISO Technical Committee 213 “Geometrical Product Specifications and Verification” and has been an expert serving on related committees since 1988. He has served as project leader and author of several ISO standards.
Prior to founding HN Metrology Consulting in 1998, Dr. Nielsen was the Technical Manager of Corporate Standards at Cummins Engine Co. in Columbus, Indiana. Dr. Nielsen holds a M. Sc. In Mechanical Engineering and a Ph. D. in Metrology, both from the Technical University of Denmark.
Course Curriculum
-
Start02 Two Parallel Planes 1 (4:30)
-
Start03 Two Parallel Planes 2 (3:25)
-
Start04 Cylinder (2:58)
-
Start05 Sphere (2:05)
-
Start06 Free-Form Surface (3:08)
-
Start07 Two Cylinders (1:58)
-
Start08 Pairs of Straight Lines 1 (2:47)
-
Start09 Pairs of Straight Lines 2 (2:19)
-
Start10 Pairs of Circles (2:12)
-
Start11 Pairs of Parallel Lines (1:57)
-
Start12 One Pair of Straight Lines (1:58)
-
Start13 One Circle (1:44)
-
Start14 One Pair of Parallel Lines (1:25)
-
Start15 One Pair of Circles (2:04)
